Best Push-Up Boards for Wrist-Friendly Home Strength: Handles, Angles, and Plastic That Does Not Flex
Buyer's GuidePower Press Push Up Board
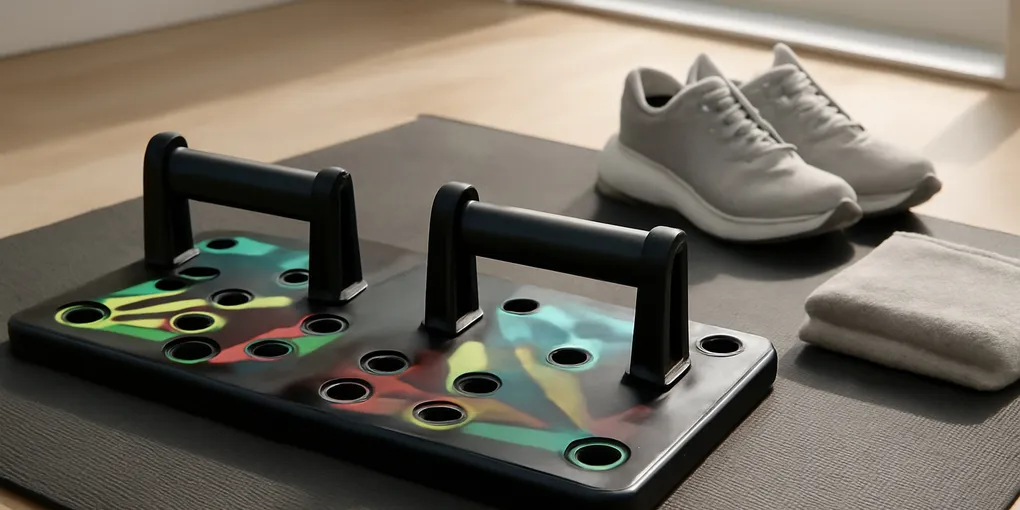
Best color-coded boardBest Use: Beginners who want repeatable hand positions and a wide base
Quick picks
| Product | Key Specs |
|---|---|
| See price on Amazon |
|
| See price on Amazon |
|
| See price on Amazon |
|
| See price on Amazon |
|
Product availability, certifications, and retailer details can change; check the current Amazon page before buying.
Bottom line
A push-up board is worth buying only if it makes push-ups more repeatable and more comfortable. The useful version gives you stable handles, enough board width for your shoulders, and positions you can control. The bad version flexes under load, crowds the hands, and turns every set into a plastic stability test.
Start by comparing a Search Amazon for Power Press Push Up Board with a Search Amazon for LALAHIGH push-up board. If you mainly want wrist-neutral handles, compare Search Amazon for Perfect Pushup Elite handles or Search Amazon for Lebert Equalizer Mini parallettes before buying a color-coded board.
Quick picks
- Best board for most beginners: a wide, non-folding board with handles that lock cleanly into the holes.
- Best small-space option: a folding board only if recent owner photos do not show hinge flex or loose handles.
- Best wrist-only fix: independent push-up handles or rotating handles, not a large board.
- Best skip: narrow boards with vague weight limits, tiny handles, or product photos showing deep shoulder angles you cannot control.
Practical score
| Factor | Weight | Score | Rationale |
|---|---|---|---|
| Research | 30% | 6.0/10 | Push-ups and resistance training are well supported, but board-specific evidence is limited. |
| Evidence Quality | 25% | 5.5/10 | Claims should stay with mechanics, comfort, load progression, and visible product features. |
| Value | 20% | 7.5/10 | A durable board or handles can make home pressing easier for little money. |
| User Signals | 15% | 7.0/10 | Flex, loose handles, wrist comfort, and slipping show up clearly in recent reviews. |
| Transparency | 10% | 7.5/10 | Board size, handle design, feet, and stated load limit are visible before purchase. |
| Composite | 100% | 6.5/10 | Useful for structured home push-ups, but not magic muscle-targeting equipment. |
What a push-up board actually changes
The main change is wrist angle. Flat-floor push-ups require wrist extension, which some people dislike. Handles can keep the wrist closer to neutral and may make pressing more tolerable. That does not mean a board fixes wrist pain or shoulder pain. If pain is sharp, persistent, or linked to injury, use a clinician-guided plan rather than forcing more reps.
The second change is hand position. Color-coded boards encourage narrow, standard, wide, and angled grips. Those positions change leverage and shoulder demand. They do not give a perfect chest-triceps-shoulder isolation map. The safest choice is the position that lets your forearm stack cleanly, your shoulder stay controlled, and your chest move through the range without pinching.
The Physical Activity Guidelines support muscle-strengthening work at least two days per week (guidelines PDF). A board helps only if it makes that work easier to repeat.
Board features that matter
Width matters first. If the board is too narrow, the advertised wide positions may still feel cramped. A wider board gives larger users more room and makes it easier to set hands under the shoulders without twisting.
Handle security matters next. The handle should seat firmly into the board and should not rock during slow reps. Look for owner photos showing the underside, peg shape, and rubber feet. If a board depends on thin plastic tabs, read recent reviews for breakage and looseness.
Grip diameter is personal. Very small handles can feel harsh in the palm, while oversized handles can fatigue the grip before the chest does. Rubberized grips are comfortable when clean, but slick rubber becomes annoying with sweat. If the board includes foam grips, check whether replacements are available or whether users report tearing.
How to use one without annoying your shoulders
Start with a standard-width position and an incline. Put the board on the floor, but place your hands on the handles while your knees or feet stay at a manageable angle. Keep the elbows roughly 30 to 60 degrees from the torso rather than flaring them straight out.
Use slow sets of 5 to 8 reps before chasing burnout. If the shoulder pinches, the position is too wide, too deep, or not right for you. The AAOS rotator cuff and shoulder conditioning program includes controlled strengthening and emphasizes pain-free movement rather than aggressive range (AAOS shoulder conditioning). Push-up boards should follow the same idea.
Product notes
Power Press-style boards are good when you want a simple visual map and a broad base. They are less appealing if you already know your hand positions and do not want a large plastic panel under the bed.
Folding boards are convenient for apartments, but hinges are the failure point. Buy only if the fold line feels locked under load and the product lists useful dimensions. A board that folds neatly but flexes on rep three is not a bargain.
Rotating handles are a different solution. Perfect Pushup-style handles let the hands turn, which some wrists like and some shoulders dislike. Use them slowly until you know whether rotation helps.
Mini parallettes are the sturdier route for people who want elevated handles. They cost more and take more space, but they can support deeper push-ups, L-sit practice, and bodyweight rows when the model is designed for that use.
Match the board to your current push-up level
If you cannot yet perform floor push-ups, do not buy for the most aggressive board position. Use the board on an incline by placing it on a sturdy bench or low box, or start with knee push-ups if that lets you keep a straight trunk. The board should make the hand position simpler while the rest of the rep stays honest.
If you already perform clean floor push-ups, use the board to standardize hand placement and tempo. Pick two positions for a month rather than changing colors every set. A good first plan is a standard position for strength sets and a slightly narrower position for lighter accessory sets. If a position causes shoulder pinch or elbow irritation, remove it rather than arguing with the diagram.
If you are using the board after wrist irritation, compare the handle angle with independent push-up handles. Some boards force a fixed grip that is not actually neutral for your wrist. Independent handles let you set width and angle more freely, while boards give you a repeatable base. The better choice is the one that lets the palm, wrist, elbow, and shoulder line up without numbness or sharp pain.
Durability checks from owner photos
Do not judge a push-up board only by the top photo. Look for underside photos, handle pegs, rubber feet, and the thickness of the plastic around each hole. The handle connection takes repeated shear force during every rep. Thin sockets and shallow pegs are common reasons inexpensive boards feel loose.
Recent owner photos are more useful than polished listing images. Check whether the board bows near the middle, whether the handles tilt under larger users, and whether the feet leave marks or slide on smooth floors. If the board folds, inspect the hinge line. Folding can be convenient, but it adds one more place for flex, noise, and wobble.
Weight limits should be treated conservatively. A listed limit is not the same as comfort during repeated angled pressure. If your bodyweight is close to the stated limit, buy a sturdier board, rotating handles, or parallettes. The cheapest board is not cheap if it makes you avoid the exercise or trust unstable handles.
Simple four-week progression
Week one is a fit test. Use 3 sets of 5 to 8 controlled reps from the easiest position that feels comfortable. Stop each set with two clean reps left. Write down the hand position, surface, and whether wrists or shoulders complained afterward.
Week two adds volume. Move to 3 or 4 sets, or add two reps per set, but do not change hand position and volume at the same time. Week three can add a second position, such as a narrower grip for lighter sets. Week four can add tempo, such as a three-second lower, if the joints feel calm.
For a fuller home program, pair board push-ups with rows, split squats, and hinge work. Our best suspension trainers guide and best resistance bands guide cover pulling options that balance pressing volume.
Push-up board FAQ
Will a push-up board make push-ups easier?
It can make the wrist position easier, but the handles may increase range of motion, which can make the rep harder. Start with fewer reps than usual.
Are the color labels accurate?
Treat them as position suggestions, not anatomy guarantees. Muscles work together during push-ups, and your shoulder shape and range matter more than a printed diagram.
Can I use a board on carpet?
Only if it does not wobble or sink. A dense mat on a flat floor is usually more predictable than thick carpet.
What should I check before the first workout?
Seat both handles firmly, press down slowly, confirm the feet do not slide, and make sure the board does not flex or creak before adding hard sets.
Sources
- Physical Activity Guidelines for Americans PDF: https://health.gov/sites/default/files/2019-09/Physical_Activity_Guidelines_2nd_edition.pdf
- AAOS rotator cuff and shoulder conditioning program: https://www.orthoinfo.org/recovery/rotator-cuff-and-shoulder-conditioning-program
- Body Science Review best push-up handles guide: /blog/best-push-up-handles-wrist-comfort/
Frequently Asked Questions
- They can be easier on some wrists because handles keep the wrist more neutral, but handle width, grip, shoulder comfort, and board stability matter.
- They change hand position and leverage, but they do not isolate muscles as precisely as the diagrams imply. Use positions that feel controlled.
- Handles are simpler. A board is useful if you want repeatable positions and a non-slip base, but flimsy boards are worse than good handles.
- No. They are a home bodyweight accessory, not a complete pressing-strength replacement.