Incline Walking Zone 2 Protocol: Treadmill Setup and Progression
ProtocolAn incline walking zone 2 protocol uses treadmill grade, speed, and heart-rate feedback to create steady aerobic work without running impact. The safest starting point is a conversational pace, modest incline, and gradual progression. The goal is repeatable low-intensity volume, not turning every walk into a maximal hill workout.
Why Incline Walking Works
Incline walking raises metabolic cost without requiring running mechanics. That is useful for readers who want aerobic work but dislike pounding, need recovery-friendly sessions, or are building consistency after a layoff. The 2011 ACSM guidance by Garber et al. (PMID: 21694556; doi:10.1249/MSS.0b013e318213fefb) supports regular moderate-intensity aerobic activity as a core fitness target. Ainsworth et al., 2011 (PMID: 21681120; doi:10.1249/MSS.0b013e31821ece12) cataloged how walking intensity changes with speed and grade, which explains why a treadmill hill can feel very different from a flat stroll. Incline is a lever. It should be adjusted to match the intended zone, not copied blindly from a viral workout.
The Zone 2 Target
Zone 2 is usually described as easy-to-moderate aerobic work: breathing is elevated, but conversation is still possible. Heart-rate zones vary by device and formula, so the talk test matters. If the reader can speak in short sentences and finish the session feeling like more was possible, the intensity is likely close. Tudor-Locke et al., 2017 (PMID: 28459099) found cadence can help classify moderate-intensity walking, but cadence alone misses incline, fitness level, heat, fatigue, and handrail use. Use heart rate, breathing, and perceived effort together.
Starter Protocol
Begin with 20 minutes, two to four times per week. Set the treadmill at 2% to 4% incline and a speed that allows nasal-or-mixed breathing without panic. Warm up for five minutes flat, then raise the incline. If heart rate climbs above the intended range, lower the grade before lowering speed. Many readers hold speed too high and then use the handrails, which changes mechanics and reduces the point of the workout. Finish with three to five easy minutes flat. The first two weeks should feel almost too easy.
Progression Plan
Progress one variable at a time. Add five minutes per session until the main set reaches 35 to 45 minutes. Then add 1% incline or 0.1 to 0.2 mph. Do not increase speed, incline, and frequency in the same week. Ekelund et al., 2019 (PMID: 31434697; doi:10.1136/bmj.l4570) showed strong dose-response associations between measured activity and mortality risk, which supports the boring truth: repeatable volume beats heroic one-off workouts. The protocol should make tomorrow’s walk easier to do, not harder.
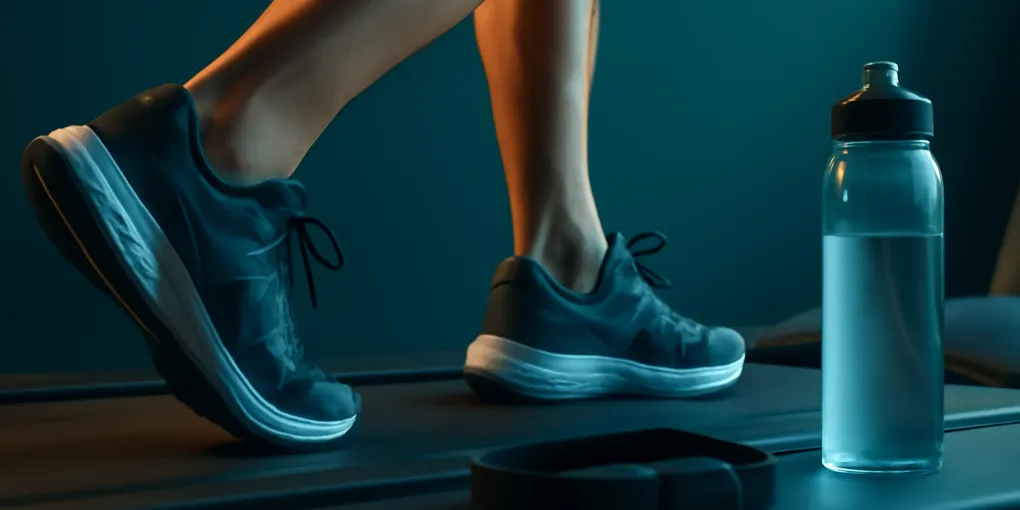
Product Selection for Treadmill Walking
The treadmill matters less than repeatability. Useful accessories are simple: a reliable heart-rate strap, comfortable walking shoes, a small fan, and a bottle that encourages hydration without sugary stimulants. Search Amazon for chest strap heart rate monitor, walking shoes treadmill, or treadmill fan. Screen listings for fit, return policy, battery life, and whether the device pairs with the watch or treadmill already used.
Incline Walking Scorecard
| Criterion | Weight | What earns a high score |
|---|---|---|
| Intensity control | 30% | Heart rate, breathing, and talk test stay in the target range |
| Repeatability | 25% | Session can be repeated several times per week without dread |
| Joint tolerance | 20% | Feet, calves, knees, and back feel normal the next day |
| Progression clarity | 15% | Only one variable changes at a time |
| Equipment simplicity | 10% | Minimal accessories and no dependence on a perfect treadmill |
Common Mistakes
The first mistake is copying 12-3-30 exactly when it is too hard. A 12% incline at 3 mph for 30 minutes can be moderate for one person and a threshold workout for another. The second mistake is gripping the rails. Light balance contact is different from hanging body weight on the treadmill. The third mistake is turning every walk into a calorie-burn contest. Zone 2 works because it is sustainable. If the session requires psyching up, it is probably too hard.
Heart Rate Setup
A chest strap is usually more stable than a wrist sensor when arms are moving, sweat changes contact, or the treadmill console interferes with watch readings. That does not mean every reader needs one. The talk test can guide most easy sessions. A strap becomes useful when the reader wants cleaner zone feedback, tends to overdo easy days, or is comparing treadmill sessions across weeks.
Use the first ten minutes carefully. Heart rate often drifts upward as the body warms, even if speed and incline stay fixed. If the session starts at the top of zone 2, it may become a harder workout by minute twenty. Start slightly below the target and let the body settle.
Outdoor Version
Incline walking does not require a treadmill. Hills, bridges, parking garages, and hiking trails can create the same aerobic stimulus. The tradeoff is less control. Outdoor grade changes, weather, surface, and downhill segments make intensity more variable.
For outdoor walks, choose a route that can be repeated. Use the same hill, the same loop, or the same park path. Keep the goal aerobic. If the hill turns the session into heavy breathing and burning calves, shorten the climb or walk flatter terrain between repeats. The best route is the one that supports consistency.
Calf and Foot Management
Incline walking loads calves, Achilles tendons, and feet more than flat walking. That is useful if progressed slowly and annoying if rushed. Beginners should start with lower incline and shorter sessions, especially if they wear minimalist shoes, have a history of plantar fasciitis, or are returning from a running break.
Soreness in calves can be normal after the first sessions. Sharp Achilles pain, morning stiffness that worsens, or foot pain that changes gait is a sign to reduce grade and volume. Rotate with flat walking until tissues adapt.
How to Combine With Strength Training
Incline walking can sit after lifting, on separate recovery days, or as a morning movement habit. If leg strength is the priority, avoid placing the steepest incline session right before heavy squats or deadlifts. If aerobic base is the priority, keep strength work but avoid turning every lower-body lift into a maximal soreness event.
A simple week might include two 30-minute incline walks, one longer outdoor walk, and two strength sessions. More is possible, but the protocol should leave the reader feeling better overall, not trapped by another metric.
When to Make It Harder
Progress only after two weeks of sessions feel repeatable. Good signs include stable breathing, no next-day joint irritation, and heart rate that no longer drifts dramatically at the same workload. Increase duration first, then incline, then speed.
Do not chase sweat as the main marker. Heat, room ventilation, caffeine, and stress can change sweat without reflecting better training. The better marker is whether the same incline and speed feel easier over time.
Four-Week Implementation Plan
Week one is the baseline week. Keep the tool or protocol easy enough that it can be repeated without special motivation. Record the setup, the session length, perceived effort, and any next-day symptoms. Do not change multiple variables at once because that makes the result hard to interpret.
Week two is the consistency week. Repeat the same setup two or three times and look for a stable pattern. If the session feels smoother, keep it. If the product creates irritation, annoyance, or avoidance, downgrade the intensity or choose a simpler tool. A plan that looks optimal but never gets repeated is not actually optimal.
Week three is the small-progression week. Add one modest change: a few minutes, a slightly harder variation, or a cleaner setup. Keep everything else stable. This is where many people overreach because early success feels motivating. Resist that impulse. The goal is a durable habit that supports training and health.
Week four is the decision week. Decide whether the tool deserves a permanent place, a situational role, or retirement. Keep it if it clearly improves consistency, comfort, or decision-making. Use it situationally if it only helps during travel, soreness, or specific training blocks. Drop it if the benefit is vague.
Evidence-to-Practice Checklist
Before buying anything, define the job. The best product is different for mobility, aerobic training, step awareness, and strength training. After buying, test the product in a low-stakes session before relying on it during a hard workout, race week, or rehab block.
Use three measures: whether the setup is safe, whether the benefit is repeatable, and whether the cost is proportionate. This keeps the decision grounded. A product can be evidence-compatible and still not worth buying for a specific reader. It can also be modestly helpful without being essential.
Who Should Be More Conservative
Readers returning from injury, managing chronic pain, taking medications that affect bleeding or heart rate, or following clinician instructions should progress more slowly. Fitness products often look low-risk because they are sold over the counter, but context matters. A safe tool used aggressively can become a problem.
Conservative does not mean passive. It means starting with a version that preserves tomorrow’s ability to train, walk, work, and sleep normally. That standard is especially useful for readers who tend to turn every health experiment into a challenge.
Final Setup Notes
Keep the first purchase simple and reversible. Choose retailers with clear returns, avoid bundles that include equipment you will not use, and save the product page until the first week of testing is complete. If the tool is uncomfortable, confusing, or hard to store, adherence will probably be lower than the marketing copy suggests.
Also separate motivation from measurement. A new product often creates a short novelty effect. Wait until that fades before judging whether the protocol or tool genuinely improves training consistency, comfort, or recovery decisions.
Track one note after each session: what changed, what stayed the same, and whether the result would make sense to repeat next week.
Frequently Asked Questions
Is incline walking as good as running?
It depends on the goal. Incline walking can build aerobic fitness with less impact, while running is more specific for running performance.
What incline should I use for zone 2?
Start at 2% to 4% and adjust by heart rate, breathing, and talk-test feedback. Fit readers may need more; beginners may need less.
Should I hold the treadmill rails?
Avoid supporting body weight with the rails because it changes intensity and mechanics. Use light touch only for balance if needed.
How often should I do incline walking?
Two to four weekly sessions is a practical start. Add duration before chasing steeper inclines.
Bottom Line
Incline walking is a strong low-impact aerobic tool when the session stays controlled. Start easier than ego wants, progress one variable at a time, and use the treadmill as a repeatability machine rather than a punishment device.
References
- Garber CE et al. Medicine & Science in Sports & Exercise. 2011. PMID: 21694556. doi:10.1249/MSS.0b013e318213fefb.
- Ainsworth BE et al. Medicine & Science in Sports & Exercise. 2011. PMID: 21681120. doi:10.1249/MSS.0b013e31821ece12.
- Tudor-Locke C et al. Journal of Physical Activity and Health. 2017. PMID: 28459099.
- Bohannon RW and Williams Andrews A. Physiotherapy. 2011. PMID: 21665164. doi:10.1016/j.physio.2010.12.004.
- Ekelund U et al. BMJ. 2019. PMID: 31434697. doi:10.1136/bmj.l4570.
Frequently Asked Questions
- It depends on the goal. Incline walking can build aerobic fitness with less impact, while running is more specific for running performance.
- Start at 2% to 4% and adjust by heart rate, breathing, and talk-test feedback. Fit readers may need more; beginners may need less.
- Avoid supporting body weight with the rails because it changes intensity and mechanics. Use light touch only for balance if needed.
- Two to four weekly sessions is a practical start. Add duration before chasing steeper inclines.