Mini-Band Glute Activation Protocol: A Short Warmup That Does Not Pretend Bands Build Everything
ProtocolQuick picks
Perform Better Mini Bands
★ Top pick Best latex mini-band search- Best Use: Light-to-moderate warmup drills where low cost and easy replacement matter
- Caveat: Latex can roll, pinch, or irritate sensitive skin
Arena Strength Fabric Booty Bands
Best fabric-band search- Best Use: Lateral walks and bridges when you want less rolling and more comfort
- Caveat: Often too wide or strong for finer ankle-position drills
Bottom line
Mini-band glute activation should make your first squats, hinges, runs, or lateral drills feel more organized. It should not become a separate workout before the workout. The best version is short: one bridge pattern, one lateral pattern, and one movement rehearsal. If you need basic latex loops, search Amazon for Perform Better Mini Bands. If bands rolling on your legs is the reason you never use them, search Amazon for Arena Strength Fabric Booty Bands or a similar fabric set.
Bands do not prove your glutes are asleep, and a burn is not the same as better mechanics. Use them to cue hip position, knee tracking, and trunk control, then move into real loaded work.
Quick picks
- Latex loop set: Search Amazon for Perform Better Mini Bands when you want inexpensive light, medium, and heavy loops for above-knee bridges and short lateral walks.
- Fabric band set: Search Amazon for Arena Strength Fabric Booty Bands when latex bands roll, pinch, or slide during lateral steps.
- Best first resistance: pick the lightest band that lets your knees track over the middle toes without making your feet twist outward.
The 6-minute protocol
Do this before lower-body strength work, running drills, or field sessions when hip control matters.
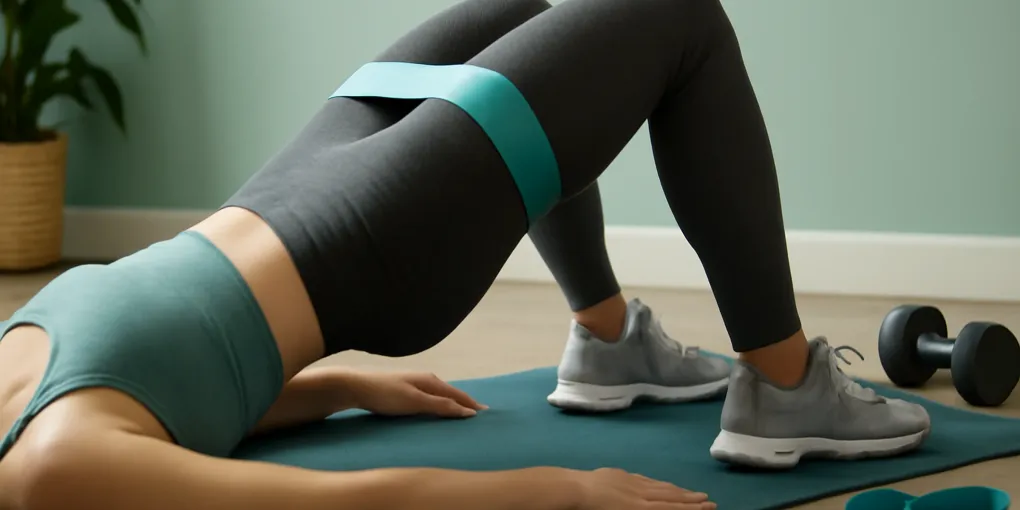
- Band glute bridge: 2 sets of 8 to 12 reps. Put the band above the knees. Keep ribs down, push knees gently out, and pause one second at the top.
- Lateral band walk: 2 sets of 8 to 10 steps each direction. Keep feet parallel, hips back slightly, and steps small enough that the band does not yank your knees inward.
- Bodyweight pattern rehearsal: 1 to 2 sets of 5 slow squats, hinges, or step-downs. Keep the same knee and hip position without chasing a burn.
Stop there. If you add three more band exercises, you may fatigue the exact muscles you wanted ready.
Band placement
Above the knees is the easiest position for most warmups. It gives feedback without demanding much ankle control. Around the ankles increases the challenge and can be useful for lateral walks, but it also encourages sloppy foot turnout if the band is too strong. Around the feet is most demanding and usually unnecessary for a general warmup.
Use the lightest band that changes your position. A band that forces you to waddle or twist your feet is too heavy. The goal is cleaner reps, not maximum tension.
Exercise cues that matter
During bridges, do not arch your low back to lift higher. Think ribs down, pelvis level, knees gently pressing the loop, and pressure through the midfoot and heel for each 8-to-12-rep set. A light Perform Better-style latex loop is usually enough above the knees; a wide Arena Strength-style fabric loop can be too much for first warmup reps if it forces the feet outward.
During lateral walks, use 10-to-12-inch steps, keep the toes mostly forward, and keep light tension on the trailing leg instead of letting it snap inward. If your knees cave in every time the trailing leg moves, reduce band tension, move the loop above the knees, or step smaller. For squats and hinges after the band work, remove the band unless a coach has a specific reason to keep it on. You need to own the movement without the external cue.
When mini bands are useful
Mini bands are helpful when someone needs a quick tactile cue for knee tracking, hip external rotation, or lateral control. They are also useful for travel because they weigh almost nothing and fit in a shoe pocket.
They are less useful when the real problem is strength, range of motion, pain, or poor exercise selection. If a squat hurts, a band warmup may not solve it. If a runner’s hip drops badly under fatigue, the answer may include strength work, running volume management, and technique changes, not endless side steps.
How to progress
Progress by making the pattern cleaner before using a stronger band. Add a one-second pause to bridges, slow the lateral walk, or move from above-knee placement to ankle placement. Only then increase band resistance.
For strength, progress to loaded hip thrusts, Romanian deadlifts, split squats, step-ups, and carries. Mini bands can prepare the pattern, but they are not the main overload tool. Our hip thrust setup protocol covers one loaded option when glute strength, not activation, is the goal.
Common mistakes
The first mistake is chasing burn. A hard burn before heavy squats can reduce output instead of improving it. The second is using a fabric band so strong that every step becomes a compensation. The third is letting the feet turn out during lateral walks, which often hides poor hip control.
Also avoid turning activation into a diagnosis. If one side feels different, that is useful information, but it does not automatically mean a muscle is inactive. Pain, numbness, or major strength asymmetry deserves a professional assessment.
Practical score
| Factor | What earns a high score |
|---|---|
| Dose | Five to eight minutes total before the main session |
| Band match | Light enough for clean knee and foot position |
| Exercise choice | Bridge plus lateral pattern plus rehearsal, not random volume |
| Transfer | The next squat, hinge, or run drill looks cleaner |
| Comfort | No skin pinching, rolling, numbness, or joint pain |
Mini-band glute activation FAQ
Should my glutes burn before lifting?
A mild feeling is fine, but a big burn is not the target. You want readiness and control, not fatigue.
Are fabric bands better than latex mini bands?
Fabric bands roll less and feel more comfortable for many people. Latex bands are cheaper and often better for lighter, finer resistance.
Where should I place the band?
Start above the knees. Move to ankles only if you can keep feet straight, steps controlled, and knees tracking well.
Can mini bands fix knee pain?
They are not a knee-pain treatment by themselves. They can cue hip control, but persistent pain needs individualized evaluation.
Sources
- Distefano LJ et al. Gluteal muscle activation during common therapeutic exercises. https://pubmed.ncbi.nlm.nih.gov/22007858/
- Selkowitz DM et al. Which exercises target the gluteal muscles while minimizing tensor fascia lata activation? https://pubmed.ncbi.nlm.nih.gov/23118070/
- U.S. Department of Health and Human Services. Physical Activity Guidelines for Americans, 2nd edition. https://health.gov/sites/default/files/2019-09/Physical_Activity_Guidelines_2nd_edition.pdf