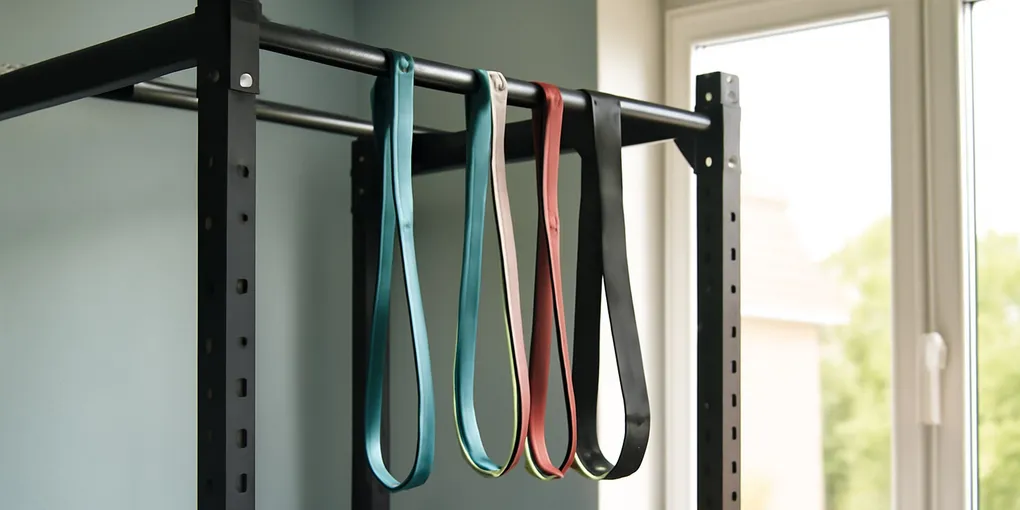
Pull-Up Assist Band Protocol: Build Your First Strict Rep Without Letting the Band Do Everything
ProtocolQuick picks
Serious Steel Assisted Pull-Up Band Set
★ Top pick Best progression set- Best Use: Beginners who need several resistance levels to reduce help over time
- Caveat: Inspect latex bands often; damaged bands can snap suddenly
WODFitters Pull-Up Assistance Bands
Best budget band set- Best Use: Home-gym users who want common pull-up assistance levels
- Caveat: Do not choose one oversized band that launches you through the rep
Rogue Monster Bands
Best rack-gym option- Best Use: Lifters who want durable long-loop bands for pull-ups and accessory work
- Caveat: Pricier than generic sets and still needs damage checks
Bottom line
A pull-up assist band is useful only if it teaches the shape of a strict pull-up. If the band launches you out of the bottom and lets you flop through the top, it is too much assistance. The goal is smooth shoulder blades, ribs down, and a controlled lower on every rep.
If you do not own bands yet, choose a real pull-up band set with multiple thicknesses. Search Amazon for Serious Steel Assisted Pull-Up Band Set is the cleanest progression-style search, Search Amazon for WODFitters Pull-Up Assistance Bands are a common budget set, and Search Amazon for Rogue Monster Bands make sense if you already buy rack-gym gear. Avoid buying one giant band that launches you through the rep; progression depends on reducing assistance gradually.
Quick picks
- Best progression set: Search Amazon for Serious Steel Assisted Pull-Up Band Set for multiple assistance levels.
- Budget home-gym set: Search Amazon for WODFitters Pull-Up Assistance Bands if you want common beginner band thicknesses.
- Rack-gym option: Search Amazon for Rogue Monster Bands for durable long-loop bands that also work for accessory drills.
Setup checklist
Use a stable pull-up bar, rack, or wall-mounted bar rated for bodyweight training. Loop the band over the bar and pull one end through the other so it cinches tightly. Step one knee or foot into the hanging loop only after you have both hands on the bar and the band is not twisted.
Inspect the band for cracks, chalked-out thin spots, or sticky aging rubber. Bands fail suddenly. Keep your face out of the direct recoil path and replace damaged bands rather than trying to squeeze one more training cycle out of them.
Pick the right assistance
Choose the lightest band that lets you perform three to six clean reps with a two-second lower. If you can do ten bouncing reps, the band is too strong. If your chin only clears the bar by craning your neck, the band is too light for today’s work.
Use the same setup for the whole four-week block. Knee-in-band and foot-in-band feel different. Grip width changes the difficulty. If you change all variables at once, you cannot tell whether you are stronger or just better assisted.
Four-week protocol
Train two or three days per week with at least one rest day between sessions.
Week 1: 4 sets of 3 to 5 assisted reps. Stop each set with one clean rep left. Add 2 sets of 8 slow band pulldowns or lat pulldowns.
Week 2: 5 sets of 3 to 5 assisted reps. Keep the same band. Add one 5-second top hold on the final rep of each set.
Week 3: Use the same band for the first three sets, then try the next lighter band for 2 sets of 2 to 3 reps. If form changes, return to the original band.
Week 4: Test one strict negative before assisted work. Jump or step to the top, then lower for 5 to 8 seconds. After that, do 4 sets of assisted reps with the lightest band that still looks clean.
What to do if you stall
If the bottom position feels impossible, add 2 sets of 5 scapular pull-ups and 10- to 20-second dead hangs before banded reps. If the top is the problem, add one 5-second flexed-arm hold after the final clean rep and one slow negative at the end of the session. If elbows or shoulders ache, cut one set, widen or narrow the grip by a hand width, and keep the same band for another week before buying more gear.
A doorway bar may be enough for practice, but make sure it fits the frame, does not rotate under a dead hang, and is rated for dynamic bodyweight use. For renters, heavier users, or anyone adding a strong assistance band, a freestanding tower or rack-mounted bar is usually safer than a cheap friction-mounted option.
Progression rules
Move to a thinner band only when all work sets have the same tempo and range of motion. Do not count reps that start with a knee kick, hip swing, or half-height chin reach. The cleanest sign of progress is that your lowering phase stays controlled when the band helps less.
Pair the protocol with rows, pulldowns, and grip work. A banded pull-up is skill practice; it should not be your only upper-back training.
Gear checklist before the first session
Use a bar that does not shift when you hang from it. Doorway friction bars are convenient, but they demand careful installation and periodic checks. If the bar rotates, creaks, or depends on trim you do not trust, do not add a band that can snap you upward and sideways. A rack-mounted bar, wall-mounted bar, or stable tower is a better long-term setup for many homes.
Band condition matters too. Inspect for cracks, whitening, thin spots, and cuts near the anchor point. Retire a damaged band. A snapped loop band near the face is not a small nuisance. If you need a full home setup rather than only bands, compare the mounting tradeoffs in our best pull-up assist bands for home strength guide before buying the thickest bundle.
Accessory work that makes the band useful
Do two pulling accessories after the assisted reps. One should train the bottom: dead hangs, scapular pull-ups, or straight-arm pulldowns. The other should train the middle and top: inverted rows, chest-supported rows, or slow band pulldowns. Keep these controlled. The goal is to build the positions the band is currently helping you skip.
Grip can be the hidden limiter. If your hands give out before your back works, add short farmer carries or dead hangs on a separate day. Our loaded carries core strength protocol is useful when grip and trunk stiffness are limiting the pull-up setup.
When to change the plan
Change the band only after you can repeat the same reps with the same tempo. Change the volume if elbows or shoulders get cranky for more than a day. Change the bar setup immediately if mounting feels questionable. Do not change all three at once. Clean training data matters here: same band, same grip, same rep target, then one small progression.
If you are close to a first rep, test singles when fresh, not after five tired sets. Try one strict rep, then return to assisted work. Missing a clean single is fine. Grinding with a kicking knee and a twisted neck teaches the wrong pattern.
For a second Amazon search path, search Amazon for the Iron Gym Pull Up Bar if you are not ready for a rack. Check door-frame dimensions, mounting instructions, and return terms before trusting any doorway bar with band-assisted reps.
Sources and safety notes
Health.gov summarizes U.S. physical activity guidance, including muscle-strengthening work at least two days per week (Health.gov: physical activity guidelines). Resistance-band training can improve strength when programmed progressively (PMID: 33333730). Shoulder pain, numbness, or sharp symptoms during hanging movements should be assessed rather than trained through.
Pull-up band FAQ
Should I put my knee or foot in the band?
Knee-in-band is easier to exit and usually safer for beginners. Foot-in-band can provide a longer assist but is more awkward if you lose control.
How long until my first pull-up?
It depends on starting strength, bodyweight, grip, and training frequency. Four weeks can improve control, but many adults need several blocks.
Do assisted pull-up machines work too?
Yes, but the fixed path is different from a free bar. Use whichever option lets you train clean reps consistently.
Frequently Asked Questions
- Use the lightest band that lets you finish clean reps with a controlled lower.
- Two or three short sessions per week is enough for most beginners.
- They train the actual bar skill more directly, but pulldowns can add useful volume.