Ab Wheel Rollout Protocol: Build Anti-Extension Strength Without Crashing Into Your Low Back
ProtocolQuick picks
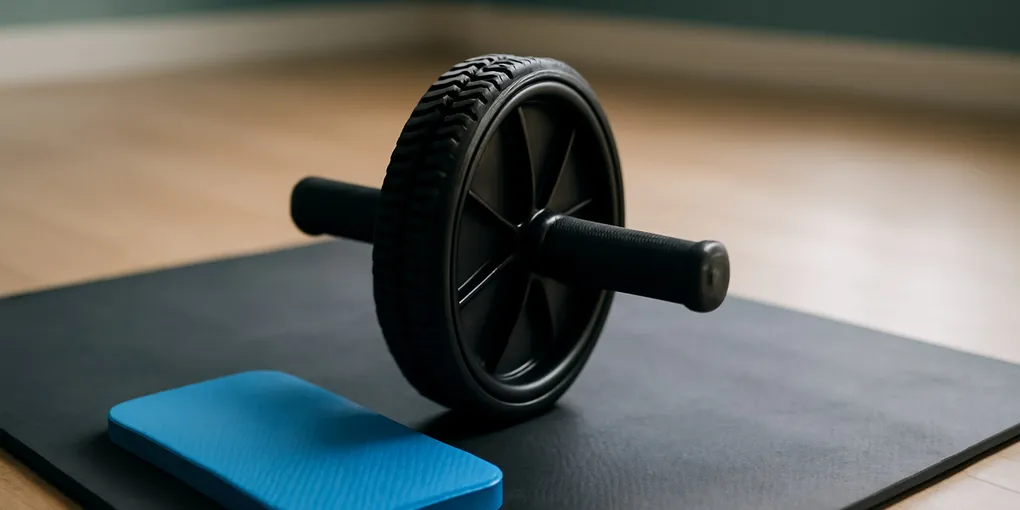
Dual-wheel ab roller with knee pad
★ Top pick Best basic tool- Best Use: Kneeling rollouts with predictable tracking
- Caveat: A wider wheel is easier to control than a narrow wheel
Ab wheel with return assist
Best for cautious beginners- Best Use: Users who need help reversing the rollout without lumbar sag
- Caveat: Assistance can hide weak bracing if you rush range
Bottom line
The ab wheel is useful because it trains your trunk to resist extension while your arms move away from your body. It is also easy to overdo. The goal is not to roll as far as possible on day one. The goal is to keep the ribs and pelvis connected while you control the wheel out and back.
A basic dual-wheel roller is enough for most people. Search Amazon for dual-wheel ab rollers with knee pads, then choose a model with grippy handles, a stable wheel, and enough floor clearance for your hands.
If you are nervous about the return phase, search Amazon for assisted ab wheel rollers, but still use the same range limits below.
Quick picks for the protocol
- Basic dual-wheel roller: best for most kneeling rollout progressions because the wheel tracks predictably and the price stays low.
- Assisted ab wheel: best if the return phase is the failure point, but use assistance to protect form, not to chase longer range.
- Thick knee pad or folded mat: not optional for many users. Knee discomfort changes bracing and can make the rollout feel harder than it needs to be.
The readiness test
Before using the wheel, hold a hard-style plank for 20-30 seconds without low-back sag, breath-holding panic, or shoulder pain. Then do a slow dead bug with the low back controlled against the floor. If those are shaky, the wheel is not forbidden, but your starting range should be very short.
You should also have open floor space. A rollout that ends with the wheel hitting furniture forces an awkward stop. Use a mat for knees and a floor surface where the wheel rolls smoothly but not wildly.
Phase 1: wall-stopped kneeling rollouts
Start on your knees facing a wall. Place the wheel so it can roll only a short distance before the wall stops it. Brace as if someone is about to poke your sides. Squeeze glutes lightly, keep ribs down, and roll until the wheel touches the wall. Pause, then pull back with the lats and abs together.
Use 2-3 sets of 4-6 reps. The wall is not a crutch; it is a range limiter. Move farther from the wall only when every rep feels controlled. If your low back drops or your hips shoot backward on the return, the range is too long.
Phase 2: open-floor partial rollouts
Once the wall version is clean, move to open floor but mark a target with tape or a yoga block. Roll only to that target. Keep the same bracing rules. The wheel should move because your shoulders open and your trunk resists extension, not because your belly falls toward the floor.
Add range slowly. A useful progression is one inch farther each week, not one foot farther each set. Most home trainees get more benefit from clean partials than from ugly near-full reps.
Phase 3: longer kneeling rollouts
Longer kneeling rollouts are enough for many people. At this stage, use fewer reps and more rest. Try 3 sets of 3-5 reps, leaving one or two clean reps in reserve. If you feel the work only in hip flexors or low back, regress.
Standing rollouts from the feet are a separate advanced skill. They require far more trunk and shoulder control. Do not make them the default goal unless your sport or training actually needs that level.
Common form fixes
If the wheel wobbles, slow down and grip evenly. If shoulders pinch, narrow the range and keep elbows soft rather than locked aggressively. If knees hurt, use a thicker pad or fold a mat. If wrists bother you, check handle diameter and wrist angle.
Breathing should be controlled. Exhale gently as you roll out or just before the hardest point. Holding your breath can make one rep feel stronger, but it also makes it harder to notice when your low back is losing position.
BSR protocol score
We score ab wheel setups on range control 30%, wheel stability 20%, handle comfort 15%, knee comfort 15%, and progression clarity 20%. The safest setup gives you a way to stop range before form fails. That is why a wall-stopped rollout beats a maximal rollout for beginners.
A cheap roller can work well if the wheel tracks straight and the handles do not twist. A fancy roller cannot fix rushing.
Programming
Use the ab wheel after your main strength work or on a separate core day. Do not place it before heavy squats, deadlifts, overhead presses, or hard intervals if it leaves your trunk fatigued. Two sessions per week is enough at first.
Pair it with side planks, carries, or dead bugs rather than doing endless rollout volume. If you want a lower-leg balance pairing, our balance pad ankle stability protocol covers a different stability demand without loading the trunk in the same way.
When to choose an easier drill
Use dead bugs, plank shoulder taps, or stability-ball rollouts if the wheel makes your low back feel pinchy even at short range. The easier drill is not a failure. It is the version that lets you train the same anti-extension idea without losing position. Return to the wheel when you can keep breathing, keep ribs down, and finish each rep without a rescue movement.
For athletes who already do heavy pressing or pull-ups, the wheel may also be limited by shoulder fatigue. Put it on a day when shoulders are fresh or keep the range smaller.
Sources and safety notes
Core exercises that challenge trunk stiffness can be useful, but exercise selection should match capacity and symptoms. The American Council on Exercise notes that ab-wheel style movements are demanding and require trunk control (ACE: ab wheel rollout). Low-back pain guidance from MedlinePlus emphasizes staying active with appropriate exercises and avoiding movements that worsen pain (MedlinePlus: low back pain self-care).
Ab wheel FAQ
Should my hips stay completely still?
No. Some hip movement is normal, but the hips should not dump forward or snap backward. Think ribs down, glutes lightly on, and range controlled.
Why do I feel ab wheel rollouts in my shoulders?
Your shoulders and lats help control the wheel. Mild effort is normal. Sharp shoulder pain or pinching means reduce range or choose a different core drill.
Can I do ab wheel rollouts after back pain?
Only if symptoms are settled and easier bracing drills feel good. Start with a short wall-stopped range or ask a clinician or qualified coach for help.
Frequently Asked Questions
- They can irritate the low back if you roll farther than you can brace. The exercise should feel like abdominal effort, not lumbar pinching.
- No. Most beginners should start with kneeling partial rollouts or stability-ball variations.
- Start with small sets of clean reps, such as 2-3 sets of 4-6 partial rollouts, and stop before form breaks.