Dip Station Strength Protocol: How to Build Pressing Volume Without Angry Shoulders
ProtocolQuick picks
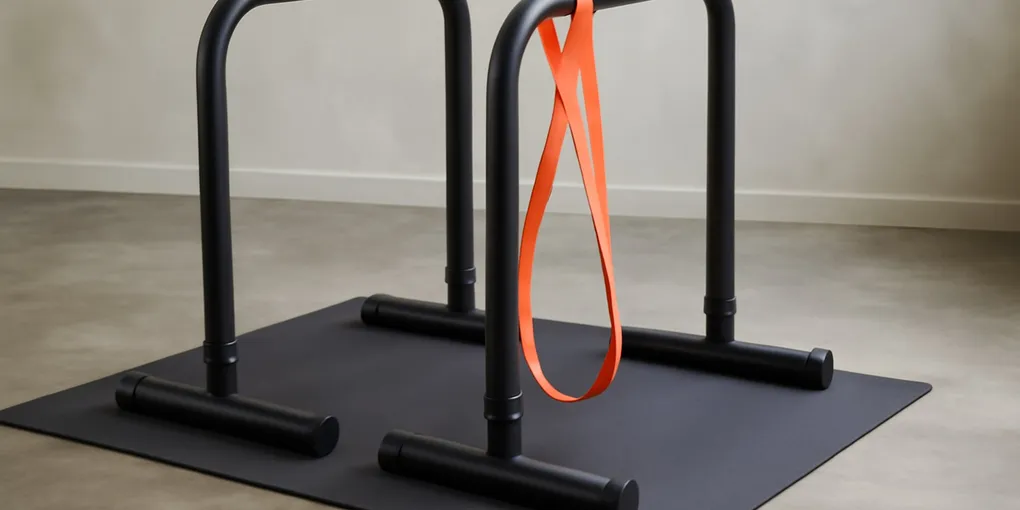
Freestanding parallel dip station
★ Top pick Best for dedicated home strength work- Best Use: Dips, support holds, knee raises, and band-assisted progressions
- Caveat: Footprint and wobble matter more than extra attachments
Heavy resistance assistance band
Best progression helper- Best Use: Reducing load while learning shoulder position
- Caveat: Band setup must be stable and centered
Bottom line
A dip station is useful if you want a compact way to train bodyweight pressing, support holds, and trunk control at home. The safest first buy is a stable Search Amazon for freestanding parallel dip stations with enough width for your shoulders and minimal wobble. Most beginners should also own a Search Amazon for heavy assisted-dip resistance bands so progression starts below full bodyweight.
The protocol below treats dips as a strength skill, not a dare. You will build support position, range, and volume before adding deep reps or external load.
Quick picks
- Building a home setup? Search Amazon for freestanding parallel dip stations and prioritize stability over accessories.
- Need a regression? Search Amazon for assisted-dip resistance bands before forcing full bodyweight reps.
Who this protocol fits
Use this plan if you can do pain-free push-ups and want to add vertical pressing volume without a full power rack. It fits home gym users, calisthenics beginners, and lifters who want triceps and chest work without always benching.
Do not use it to train through front-shoulder pain, sternum pain, numbness, or a recent shoulder injury. Dips put the shoulder into extension under load. That can be productive for the right person and irritating for the wrong one.
Equipment setup
Set the dip station on a flat surface. Test wobble before the first workout by pressing down on both handles and gently shifting weight. The handles should be wide enough that your shoulders do not feel jammed, but not so wide that elbows flare hard from the start.
If using a band, loop it evenly across both handles and place one knee or both knees on the band according to the station shape. The band should pull up through your centerline, not drag you forward.
The four-week progression
Train dips two days per week with at least 48 hours between sessions. Stop every set with two clean reps in reserve.
- Week 1: support holds. Jump or step to the top position, lock the elbows softly, keep shoulders down, and hold for 10 to 20 seconds. Do 4 to 6 holds.
- Week 2: slow partials. Lower only one-third to one-half of the range, pause, and press back up. Do 4 sets of 4 to 6 reps, assisted if needed.
- Week 3: controlled full-range-at-your-body reps. Lower until the upper arm is roughly parallel to the floor or until shoulder position starts to change. Do 3 to 5 sets of 3 to 6 reps.
- Week 4: volume consolidation. Keep the same range and add one rep per set or one set, not both. If form changes, return to Week 3.
Technique rules that matter
Start each rep from a tall support position with hands centered on the handles, wrists stacked over the bars, and shoulders pressed away from the ears. On most home stations, a useful handle spacing is roughly shoulder width to a few inches wider; if your elbows are forced straight out at the top, the frame is too wide for clean reps.
Keep the ribs stacked and elbows pointing mostly behind you rather than straight out. Lean slightly forward if you want more chest, stay more upright if you want more triceps, but do not chase either by losing shoulder control.
Depth is individual. A useful dip has a controlled bottom position you can own. A deeper dip that dumps the shoulder forward is not better. If the bottom feels pinchy, reduce range, add a centered assistance band, or switch to support holds for that session.
What makes a dip station worth buying
A dip station is only a good strength purchase if the frame stays still while you move. Check handle spacing, footprint, weight rating, and whether the bars wobble under a slow support hold. Extra attachments matter less than a frame that lets your wrists stack over the bars without forcing the elbows wide.
The training value comes from progressive bodyweight pressing and support strength, not from rushing to deep reps. A good setup should work with an assistance band, allow partial ranges, and leave enough room for controlled lowering. If the station feels unstable before you add fatigue, choose a sturdier frame or skip dips until you can access better equipment.
How to add assistance or load
Use band assistance when you cannot control the lower half of the rep. Assistance is not cheating; it lets the shoulders learn the path while the muscles build capacity. Use less band only after you can keep the same range and tempo.
Add load only after you can perform multiple sets of clean bodyweight reps with no shoulder symptoms the next day. A dip belt or weighted vest is optional. For many home users, slower tempo and more strict reps are enough.
Common mistakes
The first mistake is buying a narrow, shaky station because it is cheap. Wobble makes every rep a balance test and encourages rushed movement. The second mistake is starting with deep full-range dips before support strength exists.
The third mistake is treating shoulder discomfort as normal. Muscle effort in the chest and triceps is expected. Pinching, sharp pain, or symptoms that linger into the next day are not a progression signal.
Where it fits in a week
Place dips after your main upper-body warm-up and before high-rep push-up finishers. If you also bench press or overhead press, keep dip volume modest at first. Your triceps, shoulders, and sternum still have to recover from the total pressing dose.
Pair dips with pulling work such as rows or band pull-aparts. A simple home session might be support holds, assisted dips, inverted rows, and a light mobility drill. Our RPE scale protocol can help keep the effort honest instead of turning every set into a max test.
FAQ
Are dip stations worth it for home gyms?
Yes, if you want compact pressing and core-support work and have room for a stable frame. Skip very wobbly stations even if the price is low.
Should beginners do dips?
Beginners can train toward dips with support holds, partial reps, and band assistance. Full deep dips are not the required starting point.
How deep should dips go?
Only as deep as you can control without shoulder pinching or forward dumping. For many users, upper arms around parallel is enough.
Are dips bad for shoulders?
They are not automatically bad, but they are demanding. People with current shoulder symptoms or poor control should regress or get individualized coaching.
Sources and further reading
- ACSM resistance-training and physical activity guidance overview: https://www.acsm.org/education-resources/trending-topics-resources/physical-activity-guidelines
- WHO physical activity fact sheet: https://www.who.int/news-room/fact-sheets/detail/physical-activity
- AAOS OrthoInfo shoulder pain and shoulder-health context: https://orthoinfo.aaos.org/en/diseases—conditions/shoulder-pain-and-common-shoulder-problems/