External Heart-Rate Sensors for a Winter Watch-Over-Sleeve Setup
Buyer's GuideQuick picks
Polar H10 Heart Rate Monitor Chest Strap
Chest-strap format- Placement: Chest strap
- Watch check: Confirm your watch model documents an external-sensor connection
COROS Heart Rate Monitor Arm Strap
Arm-strap format- Placement: Arm strap
- Watch check: Confirm your watch model documents an external-sensor connection
COOSPO H808S Chest Strap
Chest-strap format- Placement: Chest strap
- Watch check: Confirm your watch model documents an external-sensor connection
Polar Verity Sense Optical Heart Rate Monitor Armband
Forearm or upper-arm format- Placement: Forearm or upper arm rather than the wrist
- Watch check: Confirm your watch model documents an external-sensor connection
These are placement-format comparisons, not a universal winner; use the manual for the watch and sensor model you own.
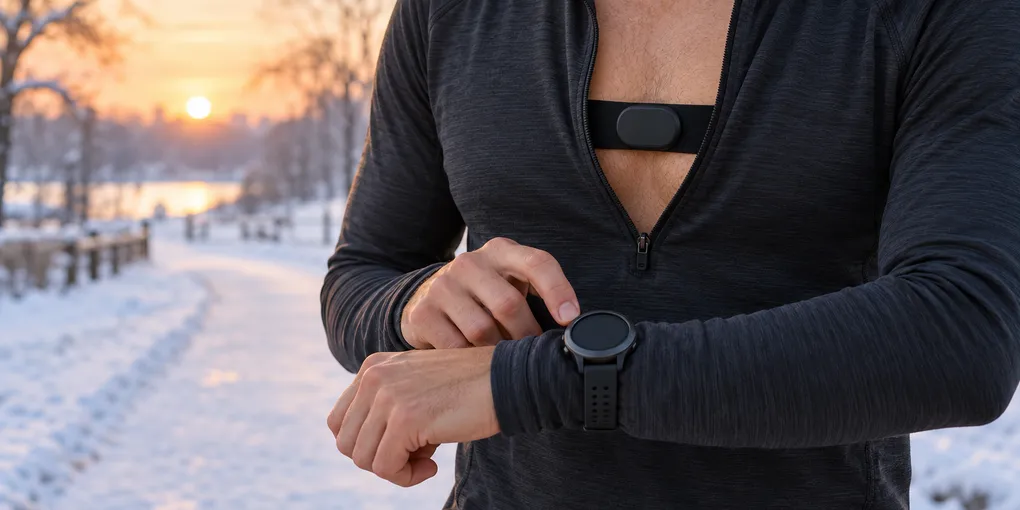
When a winter sleeve covers the place where you normally glance at your watch, moving the watch to the outside of the cuff can make the display easier to see. Choose an external sensor by the placement its maker documents, then check your watch model’s manual for external-sensor pairing support.
The split is simple: chest straps belong around the chest, while arm-style sensors belong where their instructions say on bare skin. The watch can stay over the sleeve as the display and connection point when its documented wireless-sensor options match the sensor you are considering.
The comparison criteria are the body location named in the sensor instructions, the connection options named in your watch manual, and the layer route around your collar or cuff. A chest strap needs the chest area available; an armband needs access to the forearm or upper arm; a watch over a sleeve needs a cuff that leaves its controls reachable.
Separate the watch position from the sensor position
A watch over a cuff solves a viewing problem. Treat the two positions as separate lines in your pre-run setup:
| Part of the setup | What to check | Why it matters |
|---|---|---|
| Watch | Your model’s external-sensor pairing instructions | Similar-looking watch versions can have different connection options |
| Chest strap | The strap can sit directly around the chest | This is the placement Polar documents for the H10 |
| Arm sensor | The band can sit directly on the forearm or upper arm | This is the placement Polar documents for the Verity Sense armband |
| Winter layer | The sleeve leaves the chosen sensor location clear | A sleeve position should not force a different placement than the maker specifies |
For example, Polar’s H10 guide instructs the wearer to fasten its strap around the chest. Its Verity Sense guide takes a different route: wear the armband snugly on the forearm or upper arm, with the sensor against skin. Those instructions keep the two formats easy to distinguish before you add gloves, a shell, or a watch cuff.
Check the watch manual before choosing a connection
The words on a product listing are a starting point, not a compatibility list for every watch. Start with the watch model you own and find its wireless-sensor setup page. Garmin’s pairing guidance, for example, says the watch and sensor must be paired before use and directs readers to the sensor’s own manual for pairing information. That is the sensible order for any setup: read the watch’s documented options, then the sensor’s placement and pairing instructions.
If the watch manual names ANT+ or Bluetooth support, confirm that it applies to your watch model—not just a newer, larger, or similarly named version. Then keep the sensor’s position independent of where you prefer the watch display. A readable watch on the outside of a jacket cuff and a chest strap under a partly opened layer can work together when the manuals support that connection.
Pick the physical format first
The current listings below represent two physical formats. Use them as a format check, then open the matching listing and manual before buying. Chest and arm formats have different placement instructions.
Chest strap
A chest strap keeps the sensing hardware around the chest while the watch can sit where you can see it. This format fits the Polar H10 and COOSPO H808S listings in this article. It may suit a sleeve and glove arrangement that leaves the chest area accessible for the strap described in its instructions.
Arm strap or armband
An arm-style option keeps the sensor on the forearm or upper arm instead of the wrist. The COROS listing is an arm strap; Polar’s Verity Sense manual describes forearm or upper-arm placement for its armband. A close jacket cuff at the wrist leaves the watch display and the arm sensor in two different places.
Build a five-line winter setup note
Winter gear is easier to sort out before you are standing outside with gloves on. Put the watch, the sensor, the layer you plan to wear, and the relevant manuals in one place. Then write five short lines in a phone note or on paper:
- Watch model: Copy the model name from the device or its settings screen.
- Connection page: Save the link or page title for wireless-sensor pairing in that model’s manual.
- Sensor format: Write
chest straporarmband, rather than a vague note such asexternal sensor. - Body location: Copy the placement from the sensor maker’s instructions: chest, forearm, or upper arm.
- Layer route: Note where the zip, cuff, or collar leaves that body location available.
This note separates two easy-to-confuse tasks. The watch line is about connecting and viewing information. The sensor line is about the strap or band’s documented body location. The layer line is simply a clothing check. It helps you see whether a high collar blocks access to a chest strap or whether a close cuff competes with an armband before you decide what to bring.
The note also helps when one household has several watches. A friend’s newer version, a bike computer, or an older spare watch may have a different sensor menu. Keeping the model name next to the manual page avoids making a decision from a screen that looks familiar but belongs to another device.
Make the pairing step easy to repeat
Garmin’s guidance gives a practical sequence: pair the watch and sensor before use, have the sensor active, and keep the devices near one another during setup. That sequence is about connection management rather than clothing choice, but it makes a good indoor check before a winter outing.
Start with the watch manual open and the sensor manual beside it. Turn on or wake the sensor only as its instructions direct. Use the watch’s sensor menu to add the connection, then make a short note of the menu path that worked for your model. If the connection screen offers more than one sensor type, choose the one the manual identifies for the device you own instead of guessing from a broad category name.
Once the pairing information is saved, put on your normal layer arrangement. Look at the watch face from the position where you expect to glance at it and make sure the sleeve does not cover the controls you need to reach. Then check whether the chest strap or armband still has its documented location available. You are organizing the pieces of the setup, not testing a training result.
Compare four listings by format
The four listings here give you two chest-strap choices and two arm-format choices. Start with the physical format, the placement instructions, and the connection documentation for your own watch.
For the Polar H10 and COOSPO H808S, start at the chest-strap row in the table above. Read the current product page for the model name, then return to the sensor documentation before arranging layers. For the COROS arm strap and Polar Verity Sense, begin with the arm-format row. Polar’s manual supplies the forearm-or-upper-arm detail for the Verity Sense; the current listing identifies the COROS item as an arm strap. Those details keep the category decision tied to the equipment and documentation in front of you.
A chest strap and an armband address different placement decisions. Start with the location you can follow as documented while wearing your usual cold-weather layers, then use the connection options named by your watch manual to narrow the listing choices.
Current listings to compare
Fresh Article evidence recorded these four direct Amazon listings as available. Before purchasing, compare the current listing with the placement instructions and your watch manual.
Polar H10 Heart Rate Monitor Chest Strap
COROS Heart Rate Monitor Arm Strap
COOSPO H808S Chest Strap
Polar Verity Sense Optical Heart Rate Monitor Armband
Evidence boundary
This comparison stays with documented placement, current product identity, and the need to check the watch model’s documented external-sensor support. It does not assess accuracy, health, training, safety, or performance outcomes. Sensor placement remains the maker’s instruction rather than a way to read through a layer.
Frequently asked questions
Can I wear my watch over a winter sleeve and use an external heart-rate sensor?
Yes, if the sensor is placed where its maker documents and your watch model documents a compatible external connection. Moving the watch display leaves the sensor’s placement instructions unchanged.
Where should an arm-style heart-rate sensor go?
Follow the maker’s placement instructions. Polar’s Verity Sense guide says to wear its armband snugly on the forearm or upper arm, rather than on the wrist.
How do I check whether my watch can use an external sensor?
Open the manual or support page for your watch model and look for its wireless-sensor pairing instructions. Another version of the watch may use different connection options.